Get Mascara That Won’t Quit
Hey there, beautiful! Let’s talk about mascara – that magical product that makes us look like we have longer, fuller lashes. Mascara is a makeup staple, but it can be frustrating when it starts to dry out or smudge throughout the day. That’s why learning how to make your mascara last longer is key to any beauty routine.
Before you even think about applying mascara, you need to prepare your lashes. Cleaning your lashes beforehand ensures that you’re starting with a fresh canvas. I like to curl my lashes to give them more lift, but make sure you do this before mascara application (otherwise, your lashes may break). And don’t forget the eyelash primer. It can make a huge difference in the longevity of your mascara and help it adhere better to your lashes.
Choosing the right mascara is also important. Do you want something waterproof or non-waterproof? Do you want to emphasize volume or length? This all depends on your personal preference and the desired outcome you’re looking for, but always keep your lashes’ health in mind.
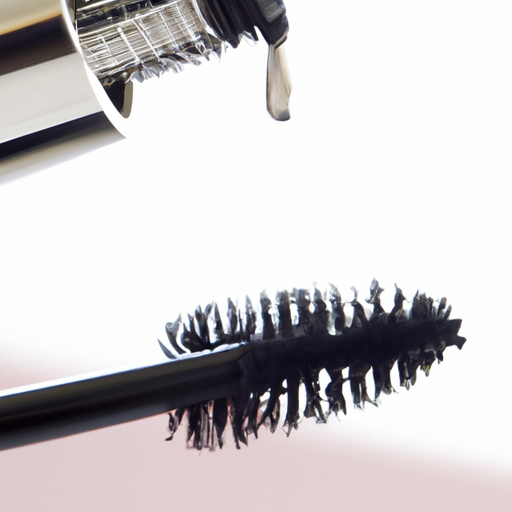
Now comes the fun part: apply your mascara! If you’re new to mascara, don’t worry – it just takes some practice. The key is to start at the base of your lashes and wiggle the applicator up to the tips. Repeat this process for your whole lash line. And for the love of mascara, do not pump the wand! This only introduces air into the tube and can dry out your mascara even faster.
When it’s time to remove your mascara, don’t just use any old cleanser. Use a specific makeup remover designed for the eye area to avoid any irritation or damage. Also, try to avoid rubbing and tugging at your lashes to prevent any unnecessary fallout.
So, there you have it. By following these simple tips and tricks, you’ll have lashes that stay voluminous and fluttery all day long. And remember, don’t be afraid to experiment with different mascaras until you find the one that’s perfect for you.
Prepping My Lashes: The Secret to Superstar Mascara
Before I apply my favorite mascara, there are a few crucial steps I take to ensure my lashes look their best. In this section, I’ll share my go-to tips for preparing your lashes, making your mascara last longer, and avoiding clumps or smudging.
Clean And Curl Your Lashes
If you’re applying mascara to dirty lashes, you’re setting yourself up for clumps and flaking. I always start by cleaning my lashes with a gentle makeup remover or micellar water. This step ensures my lashes are free of any leftover makeup, oils, or dirt that might interfere with the mascara’s performance.
Once my lashes are clean, I use a lash curler to give them a little extra lift. I gently clamp down on my lashes at the base, hold for a few seconds, and release. Not only does this step give my lashes a more dramatic look, but it also helps the mascara apply more evenly.
Apply An Eyelash Primer
If you have thin or sparse lashes, or if you struggle with mascara smudging or flaking, an eyelash primer can be a game-changer. These products coat your lashes with a special formula that helps the mascara adhere better and last longer.
To use an eyelash primer, I simply apply a small amount to my clean, dry lashes before applying mascara. Some primers may require a few minutes to dry before you apply your mascara, so check the instructions before you start.
I’ve Got You Covered: Choosing the Right Mascara
Choosing the right mascara can be a daunting task. With so many options out there, it can be hard to know where to start. But fear not! I’ve got you covered with my expert advice on how to choose the perfect mascara for your needs.
Waterproof or Non-Waterproof Mascara
One of the first decisions you need to make when choosing mascara is whether you want it to be waterproof or non-waterproof. If you lead an active lifestyle or live in a humid climate, waterproof may be the way to go. However, if you have sensitive eyes or find waterproof mascara difficult to remove, non-waterproof may be a better choice.
Volumizing versus Lengthening Mascara
When it comes to mascara, you also need to consider whether you want a volumizing or lengthening effect. Volumizing mascara adds fullness to your lashes, while lengthening mascara helps to add length. If you’re blessed with already thick lashes, lengthening mascara may be the way to go. If you have thinner lashes, volumizing mascara can help to make them appear fuller.
Affordable or High-End Mascara
Another consideration when choosing mascara is whether you want to go for an affordable or high-end option. While high-end mascaras can be expensive, they often offer more superior formulas and application, making them worth the splurge. However, there are many affordable mascaras on the market that offer great performance and are kind to your wallet.
Choosing the right mascara is important to achieve the look you desire. Be sure to consider if you want waterproof or non-waterproof, volumizing or lengthening, and if you’re willing to splurge on a high-end option. Whichever mascara you choose, be sure to apply it correctly and remove it gently to keep your lashes looking their best.
My Mascara Routine: Applying Like a Pro
Okay, it’s time to apply the mascara. This is where the real artistry comes in. Here’s how I do it:
Step-by-Step Instructions
First, I start at the base of my lashes and wiggle the brush back and forth. This helps to distribute the product evenly so the lashes don’t clump together. Then, I slowly move the brush up the length of the lash, making sure to coat each one as I go. If I want extra volume, I apply a second coat before the first one has fully dried.
Tips for Avoiding Clumps
The key to avoiding clumps is to apply the mascara slowly and with a light touch. Another trick is to use a lash comb or a clean toothbrush to separate the lashes after applying the mascara. You can also try dusting a little bit of powder on your lashes before applying the mascara to give it something to grip onto.
Expert Advice: Applying to the Bottom Lashes
For the bottom lashes, I like to use a smaller brush so I have more control. I place the brush at the base of my lashes and carefully drag it downwards, separating and coating each lash as I go. I find that using a lighter touch and smaller brush helps me avoid smudging or creating a spider-eyelash effect.
Remember, it can take practice to find the perfect mascara application technique for you. Don’t be afraid to experiment with different brushes, products, and styles until you find the perfect look for you!
How to Get Your Mascara Off without Making a Mess
Okay, so you’ve rocked your mascara all day, looking fabulous, but now it’s time to take it off. The last thing you want is to end up with raccoon eyes or irritated skin. Here are some tips to help you remove your mascara without making a mess.
Cleanse First
Before you grab your mascara remover, start with a gentle cleanser to remove any dirt or oil from your face. This will help prevent your mascara from smudging or flaking.
Be Gentle
When it comes to removing mascara, less is more. Don’t scrub too hard or use too much pressure, or you could end up damaging your lashes or pulling them out. Instead, use a gentle touch and let the remover do the work.
Use the Right Remover
Choose a remover that’s specifically designed for mascara, and make sure it’s gentle enough for your skin type. Oil-based removers can be helpful for stubborn formulas, but can also be heavy and cause breakouts. A micellar water can be a great option for those with sensitive skin.
Cotton Swabs or Pads
Instead of using a washcloth or towel, which can irritate your skin, opt for a cotton swab or pad. These will be more effective at targeting small areas and won’t spread any mascara accidentally.
Don’t Forget to Rinse
Once you’re done removing your mascara, make sure to rinse your face with cool water to help soothe your skin and remove any leftover product. Pat your skin dry with a towel, but avoid rubbing or scrubbing.
With these tips in mind, you can say goodbye to panda eyes and hello to fresh, clean lashes. Check out VM Makeup & Hair for more makeup tips and tricks!
Wrapping It Up: Tips and Tricks for Long-Lasting Mascara
Well, that’s a wrap folks! With these simple tips and tricks, you’ll be able to make your mascara last longer and achieve the perfect look every time.
Let’s recap what we’ve learned: First and foremost, preparing your lashes is key to ensuring your mascara goes on smoothly and lasts throughout the day. This includes cleaning and curling your lashes, as well as using an eyelash primer to help your mascara adhere better.
When it comes to choosing the right mascara, there are a few factors to consider, including whether to go waterproof or non-waterproof, and whether you want a volumizing or lengthening effect. Whatever you choose, applying mascara is all about technique – be sure to follow our step-by-step instructions to avoid clumps and smudging.
And lastly, when it’s time to remove your mascara, be gentle and use an oil-based remover to avoid pulling out your lashes and causing smudging.
With these tips under your belt, feel free to experiment with different mascaras to find the perfect one for you. Happy lashing!