Get a Flawless, Matte Look with Blotting Paper
Hey there, beauty lovers! Are you tired of constantly battling an oily complexion? Not to worry, I have the solution: blotting paper. This miracle product is an essential item in my makeup bag. Blotting paper does wonders for controlling excess oil and shine. In this article, I’ll share with you the benefits of using blotting paper, along with tips and tricks on how to achieve the perfect matte look.
But first, let me introduce myself. I’m a beauty blogger and makeup enthusiast with years of experience in the industry. My goal is to help women feel confident in their own skin and encourage them to experiment with different makeup looks. And what better way to do that than with the help of blotting paper?
So, without further ado, let’s dive into the world of blotting paper and how it can transform your makeup routine. But before that, if you want more tips on creating a perfect matte look, check out this link.
What is Blotting Paper?!?
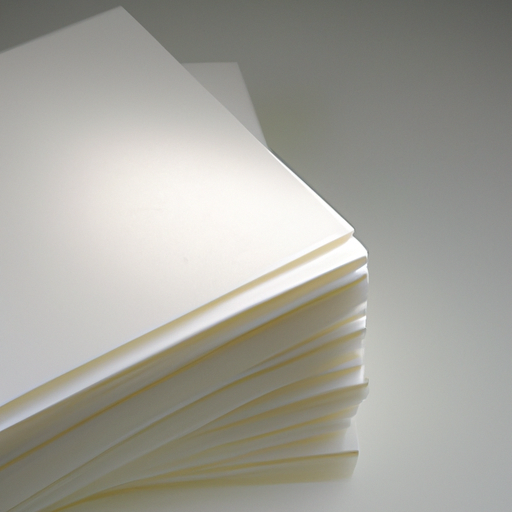
Hey there! Let me introduce you to one of my favorite beauty tools – blotting paper! This magical beauty staple is a thin, absorbent sheet of paper that is used to soak up excess oil and sweat from your skin, leaving your face with a matte finish. Blotting paper comes in various sizes and materials, but the most common ones are made of natural fibers like rice paper or pulp.
But why do we need blotting paper, you might ask? Well, our skin produces natural oils that can make our face look shiny and greasy throughout the day. Moreover, when we wear makeup, the oils from our skin can mix with the product and cause it to smudge or slide off. This is where blotting paper steps in to save the day!
By gently pressing the blotting paper onto the oily areas of your face, it absorbs the excess oils and sweat without removing your makeup or irritating your skin. Blotting paper is particularly useful for people with oily or combination skin, or when you need to freshen up your makeup on the go.
How Using Blotting Paper Brings Out the Best in Your Matte Look
Let’s face it: we all want a perfect, shine-free matte complexion. But what are some benefits of using blotting paper for that ultimate matte look? As someone who has struggled for years with oily skin, I can attest to the magic of this beauty tool.
First and foremost, blotting paper removes excess oil from your skin without removing any makeup. So you can maintain your flawless look throughout the day without having to reapply any makeup. Plus, using blotting paper instead of powder prevents the caked-on, over-powdered look that can sometimes come with traditional matte products.
Another benefit of using blotting paper is that it can help keep your skin hydrated. Many people are under the impression that matte products dry out your skin, but blotting paper can maintain the moisture balance of your skin while still giving you a matte finish.
And finally, using blotting paper is a quick and easy way to touch up your makeup throughout the day. Instead of carrying around a bulky powder and brush, blotting paper can fit in your pocket or purse and be easily whipped out for a quick touch-up.
So if you’re looking for a solution to keep your skin matte and shine-free, without sacrificing hydration or having to carry around a lot of products, invest in some blotting paper. Your skin (and your makeup routine) will thank you.
Steps to Achieve the Best Matte Look with Blotting Paper
Hey there, beauty enthusiasts! Are you looking for ways to achieve that perfect matte finish with blotting paper? Look no further as I share my expert tips and tricks on how to use blotting paper for a flawless matte look!
Step 1: Choose the Right Blotting Paper
Not all blotting paper is created equal, so it’s important to get the right one that suits your skin type and needs. For oily skin, go for blotting paper that is specifically designed to absorb excess oil and sebum. If you have dry or sensitive skin, opt for a gentler blotting paper that won’t strip your skin of its natural oils.
Step 2: Blot Strategically
When using blotting paper, it’s important to blot only where needed. Don’t rub or press too hard as this can cause irritation and redness. Instead, gently press the blotting paper onto the oily areas like the T-zone or the sides of your nose, and allow it to absorb excess oil. Repeat the process if needed.
Step 3: Touch Up with Makeup
If your skin is prone to shine and oiliness, it’s best to touch up with makeup after using blotting paper. Use a powder foundation or setting powder to mattify your skin and set your makeup in place. Keep a compact mirror and a small powder brush in your bag for on-the-go touch-ups.
Step 4: Don’t Forget to Hydrate
Using blotting paper can effectively remove excess oil, but it can also make your skin feel dry and tight. To avoid this, make sure to hydrate your skin before and after using blotting paper. Use a lightweight moisturizer or hydrating mist to keep your skin nourished and dewy.
Step 5: Dispose of Used Sheets Properly
After using blotting paper, make sure to dispose of the used sheets properly. Don’t flush them down the toilet as they can clog your pipes and harm the environment. Instead, throw them in the trash bin.
There you have it, my simple yet effective steps to achieve that perfect matte look with blotting paper. Remember, less is more, and always listen to your skin’s needs. Happy blotting!
Tips & Tricks on Using Blotting Paper: From an Expert
Hi there! As someone who has been using blotting paper for years, I’ve learned a few tricks to achieve the perfect matte look. Here are my tips:
1. Choose the Right Blotting Paper
Not all blotting papers are created equal. Some are designed specifically for oily skin, while others are more suitable for combination or dry skin. Make sure you choose the right type for your skin type and needs.
2. Don’t Rub, Just Press
When using blotting paper, it’s important not to rub or drag it across your skin. Instead, gently press it onto your skin and hold it there for a few seconds. This will absorb excess oil without disrupting your makeup.
3. Use a Clean Sheet Each Time
Using the same sheet of blotting paper multiple times can actually spread bacteria and oil around your face. Make sure to use a fresh sheet each time you blot.
4. Blot Before Touching Up
If you need to touch up your makeup during the day, make sure to blot first. This will remove any excess oil that could cause your makeup to slide or smudge.
5. Blot Your Hair, Too
Blotting paper isn’t just for your face – it can also be used to absorb oil from your hairline and scalp. Simply press a sheet of blotting paper onto your hairline and any oily areas, and voila – instant refresh!
6. Store Blotting Paper Properly
To keep your blotting paper clean and effective, it’s important to store it properly. Keep it in a cool, dry place – not in your purse or makeup bag where it could get dirty or damp.
And there you have it – my top tips and tricks for using blotting paper like a pro. Happy blotting!
Conclusion: Wrapping it Up with a Matte Finish!
Wow! I never realized that using blotting paper could make a huge difference in achieving a seamless matte look. As someone who loves to experiment with new makeup trends, I am happy to have learned about this beauty hack.In conclusion, blotting paper is a quick and easy solution to tame any oily shine on my face. It provides an absolutely flawless matte finish that lasts all day without leaving any residue on my skin. Besides, it is quite affordable and travel friendly, which makes it a great addition to my makeup kit.When using blotting paper, be sure to follow the correct steps and use it in the right way to get the most out of it. Consider practicing tips and tricks, such as applying a setting spray before using the blotting paper, and blotting gently on the face with a light-handed touch to avoid smudging your makeup.Overall, I would highly recommend blotting paper for anyone looking to achieve a perfect matte finish. Give it a try, and you won’t be disappointed!