Why Applying Mascara to My Lower Lashes is a Game Changer!
Hey there, beauty enthusiasts! Are you tired of applying mascara only to your upper lashes and leaving your lower lashes bare? I used to do the same until I discovered the magic of applying mascara to my lower lashes. It may seem like a small step in your makeup routine, but it can make a huge difference in the overall look of your eyes.
First and foremost, applying mascara to your lower lashes helps to define your eyes and make them appear more open and awake. It enhances your natural lash line and adds length to your otherwise invisible lower lashes. Additionally, mascara on your lower lashes can balance out your makeup look and make it look more complete. If you’re someone who wears eyeshadow or liner, mascara can help to tie everything together.
Furthermore, applying mascara to your lower lashes can help to create a more youthful appearance by making the eyes appear larger and more vibrant. It’s a simple trick that can take years off your face without any invasive procedures. Trust me, you’ll be amazed at the difference it can make!
So, if you’ve never tried applying mascara to your lower lashes, give it a go and see how it can transform your look. It may take a little practice, but with the right mascara, technique, and some of the tips I’ll be sharing with you, you’ll be a pro in no time!
Preppin’ Your Lashes: The First Step to Perfect Mascara Application
Alrighty, folks! Before we dive into applying your favorite mascara to your lower lashes, let’s chat about prepping those bad boys. First off, cleansing your skin is a crucial step in ensuring your lashes are ready to go. A clean slate means less gunk and debris getting in the way of that beautiful mascara formula. So, make sure you’re washing your face thoroughly before getting started.
The next step, which I personally never skip, is using a lash curler. Trust me; it’s a game-changer for making those lashes pop. A simple squeeze at the base of your lashes, and you’ll notice an immediate lift that will also help the mascara adhere better.
So, remember, clean and curled are the two Cs of lash preparation for perfect mascara application on lower lashes.
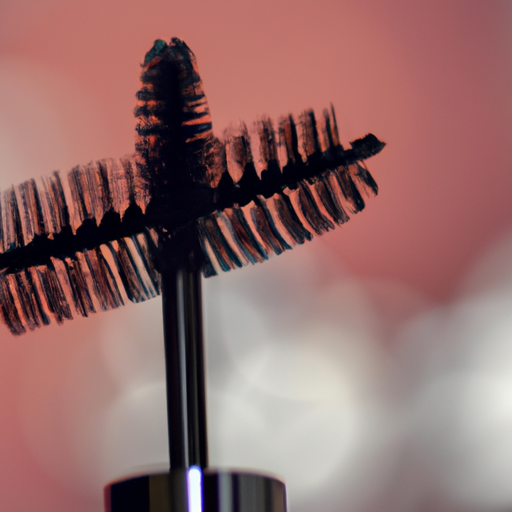
Choosing the Right Mascara
Now that we’ve prepared our lashes, it’s time to choose the right mascara for the job. There are a few important factors to consider when selecting your mascara. First and foremost, you’ll want to think about the type of brush you prefer. Do you like a thicker, fuller brush, or a thinner, more defined brush? The type of formula is also important – do you want a waterproof mascara or a regular one?
Another thing to consider is the color of the mascara. If you have fair skin and light eyelashes, you may want to consider a brown mascara instead of black to create a more natural look. On the other hand, if you have darker skin and lashes, black mascara can provide a dramatic effect.
Lastly, consider any specific needs you have for your lashes. Do you want a mascara that provides volume or length, or both? Do you have sensitive eyes that require a gentle formula? Make sure to read product reviews and do your research before making a purchase.
Applying Mascara to Lower Lashes In Simple Steps
Okay, so you’re ready to apply mascara to your lower eyelashes. Let’s dive into it!
Curl Your Lashes
Before applying mascara to your lower lashes, curl your upper lashes with an eyelash curler to give them a lift. This will also help to prevent mascara transferring onto your skin.
Get the Right Mascara
Use a mascara with a smaller wand for your lower lashes to avoid getting product on your skin. A lengthening mascara is a better option than a volumizing one, but make sure it’s not too watery, or it might smudge.
Wipe off Excess Mascara
Gently remove any excess mascara from the wand using a tissue. This will help prevent clumping.
Look Down
Hold a mirror below your face and look down into it, making it easier to apply mascara to your lower lashes without getting it everywhere. Place the wand at the base of your lashes and sweep it outwards in a zigzag motion to get that perfect coat.
Repeat for the Other Eye
Apply mascara to your other eye using the same technique.
Be Careful Where You Blink
Be careful not to blink while the mascara is still wet, or you’ll end up with smudged eyeliner. To make it easier, use a mascara that dries quickly or apply baby powder on your lower lashes between coats.
Wiggle and Tilt
When you’re applying mascara to your lower lashes, wiggle the brush back and forth and tilt it slightly downward to create a feathery look.
So there you have it! Follow these six simple steps to apply mascara to your lower lashes without making a mess. For more tips and advice, check out VM Makeup And Hair.
5. Tips for Avoiding Clumping
Okay, so you’ve chosen the perfect mascara for your lower lashes, now it’s time to apply it. But wait, there’s one thing you need to be careful about: clumps. Nothing ruins a beautiful makeup look quite like clumpy lashes. Here are some tips to avoid this nightmare:
Firstly, start with a clean mascara wand. If your wand is coated in old product, it’ll just transfer to your lashes and cause clumping. Clean the wand before each use or use a disposable one to avoid this.
Transitional phrases are important too. After you’ve dipped the wand into the mascara, make sure to wipe off any excess product. This is where the clumps can come from. I like to use a tissue to gently remove any excess mascara, leaving just enough to coat my lashes evenly.
Another tip is to work quickly. Mascara dries fast, so the longer you take to coat your lashes, the more likely it is that clumps will form. It’s best to work in sections, doing a few lashes at a time and moving on to the next section before the first one dries.
Finally, if you do end up with some clumps, don’t panic. Use a clean mascara wand or a lash comb to gently separate the lashes and remove any excess product. Avoid adding more mascara on top of the clumps, as this will just make things worse.
These tips may seem simple, but they can make a huge difference in the end result. Follow them and you’ll have perfectly separated, clump-free lower lashes in no time!
Final Thoughts: Closing in on Lower Lash Application
To wrap things up, applying mascara to the lower lashes can make a big difference in your overall makeup look. Don’t forget to prep your lashes by cleansing and curling them before applying mascara. When it comes to choosing the right mascara, consider factors like the formula, brush shape, and color.
When applying mascara to your lower lashes, start from the roots and zigzag your way towards the tips. Use a light hand and wiggle the brush back and forth to separate lashes and prevent clumping. If you do encounter clumps, don’t worry! You can use a clean spoolie or a small brush to remove them.
Remember, practice makes perfect! Don’t be discouraged if your first attempts don’t turn out as expected. Keep trying and experimenting with different techniques until you find what works best for you. And above all, have fun with your makeup!